
Note: All tools used are linked at the bottom of the post.
In this guide I will cover:
- How to extract the models and textures from the game using Unreal Engine Resource Viewer
- How to convert Unreal 3D model files to .obj using Blender
- A brief demonstration of both basic and advanced AI upscaling techniques for the textures
Extracting the files from the game using Unreal Engine Resource Viewer
- Extract the Unreal Engine Resource Viewer archive and open umodel.exe (or umodel_64.exe)

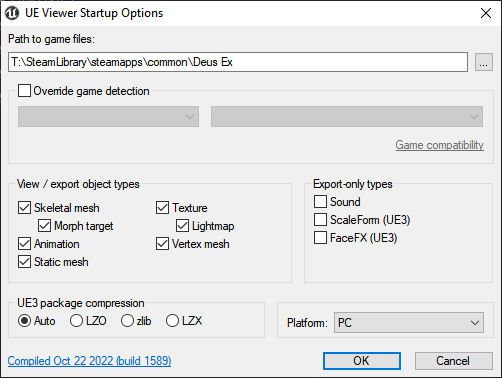
- Set the path to game files, check all view/export object types, and set Platform to PC > click OK

- To extract all models and textures, right-click the System folder in the file tree on the left and select Export folder content. To extract individual packages, select them from the list on the right and click the Export button

- The export dialogue will appear, the options can stay as default > click OK

- A window will appear showing the export process. The console window will also show the path of each file exported. When it is complete, the last line will say “Exported xxxx/xxxx objects in x seconds”


- In the folder you extracted to, there should be subfolders representing each of the packages. Inside you can find all the textures and models, even including UI images


 Note: You can also natively extract .u packages without having to download additional software tools by opening Command Prompt in the System folder and running the following command:ucc fullbatchexport [package name].u .\[package name]For example, for all the character meshes and textures, replace [package name] with DeusExCharacters:ucc fullbatchexport DeusExCharacters.u .\DeusExCharactersYou can do the same for any .u file in the game files.
Once extracted, a subfolder should be created within the System folder with the name of the .u file you've extracted as well as its contents. The only issue with this method is that the entire .u file is extracted, you will be unable to navigate a user interface to search for and extract specific items. - Alternatively, you can open the packages and view the meshes and animations before extracting, for example to view the characters, select the DeusExCharacter.u package > Open
 Note: The table below shows what kind of models are in each package file if you are searching for something specific
- The package will load, and when complete the UE Viewer window will appear. Here it is possible to cycle through all the textures and meshes by tapping the Page Up and Page Down Key. For other view controls, tap H to display them on screen

.png)
- Find all the character textures you want to extract and then go to Tools > Export current project > the export dialogue will appear as shown previously where you can select the file path to save it to

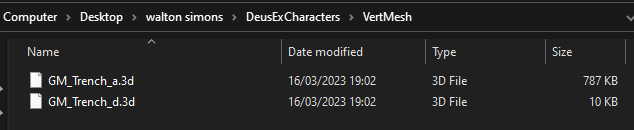
- Then locate the correct mesh for the character, and export again. Once done, you will have all the textures and meshes you need. The Textures can be found in the subdiretory DeusExCharacters > Textures - and the models can be found in DeusExCharacters > VertMesh


.png)


Note: The meshes are rather simple and are shared between many characters, for example the GM_Trench object is shared between male characters that wear the standard trenchcoat design, such as JC Denton, Paul Denton, Walton Simons, etc. Below is a table showing examples of the different kinds of objects.

Convert Unreal 3D model files to .obj using Blender
- Blender is required as well as the UE 1 Vertex Mesh plugin that allows Blender to load and interpret the .3d files extracted from the previous section.
To install the plugin, download the plugin > open Blender > Edit > Preferences > Add-ons > Install > browse the the plugin zip file > Install Add-on > check the Import-Export: Unreal Engine 1 Vertex Mesh Format box > click the three-lines “burger” menu at the bottom left of the preferences window > Save Preferences


- Now the .3d models can be opened by going to File > Import > Unreal Engine Vertex Mesh (_a.3d, _d.3d)

- Upon import, the model will be stretched vertically for some reason. To fix this select the mesh in the Scene > go to Object Properties > Transform > Scale Z > 0.5. It will also help to change Rotation Z to 180 as the “front” of the mesh seems to be facing the wrong wayNote: In this example of preparing the Walton Simons model, I had to delete the sunglasses mesh part. As there didn’t seem to be another male trenchcoat model without the sunglasses. To do this, I went into Edit mode > selected the faces using the L key > deleted vertices using the X key. Then I deleted the associated Materials, which were the last two:


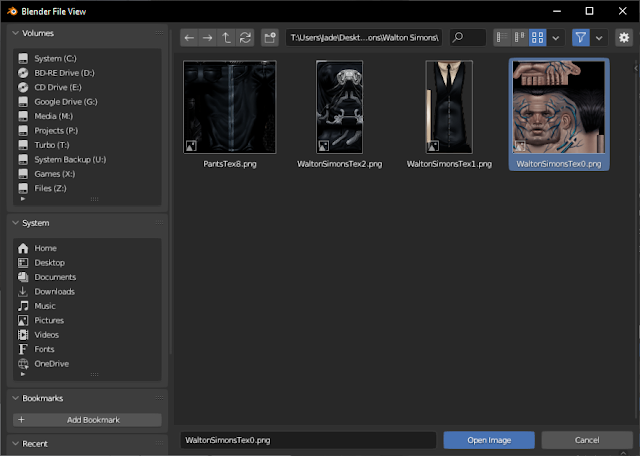
- The mesh currently has no textures, but it has materials. To assign each of these materials textures, make sure the mesh is selected and then go to the Material Properties. Here each material can be selected in the list. To click the Use Nodes button > yellow dot to the left of Base Color > Image Texture > navigate to the matching texture extracted earlier


- The changes will not be visible on the mesh yet within the viewport. To see the textures on the model, go into Material or Render mode. If the texture is very shiny, dark or saturated, parameters can be tweaked, for example the Specular and Roughness properties can be turned down. Repeat steps 4 and 5 for every material, and once complete I recommend saving the Blender project file so you always have this complete state to revert back to after making further changes


- When importing into Blender with the plugin earlier, the animations were also imported. You can view them by clicking Animation on the Menu bar at the top and then the timeline will appear. If you select and move the playhead, it will cycle through all the different animations such as walking, running, dying, shooting, etc. You can also view them more precisely by tapping the arrow keys left and right on your keyboard


- Finally, to export as .obj go to File > Export > Wavefront Object (.obj). The .obj mesh will have the pose that was set by the animation playhead


Now, when I try to open the .obj file in XNA Lara, all the textures successfully load:


Demonstration: AI Upscaling (Basic)
I have a NVIDIA GPU that supports Ansel. It has a feature that does real-time upscaling of textures in-game, however I encountered a few tools online that managed to isolate this capacity to be used for any image outside of a game. This provides a very basic upscale but it's completely free and fast, using my own hardware. In this demonstration, I used one called AI Res Up Tool, however there is also NVIDIA Ansel AI Enhancer which produces very similar results.
When browsing for other AI upscaler solutions, I encountered one called Topaz Photo AI which is a bit different from the other upscalers insofar that one of its features is smart recognition of faces. This one has to be paid for, however they offer a trial version to test out. I used the trial version for this demonstration.
I also found that more generic online services such as Img Upscaler produces great quality with regards to other textures such as clothing or objects. I do not think they work great for faces, though. Considering this, I believe the most ideal method to approach this is use different tools depending on what exactly you want to upscale.
Here is a comparison for the face:

The original here has just been resized x4 with Nearest Neighbor interpolation. Looking closely, Topaz seems to have done pretty well to preserve the facial details, however there appears to be a lot of noise and some of the colour has become more saturated in some areas such as the hands. The Bioelectrics are a bit blurry, and the ear looks very flat. AIResUp on the other hand is not as sharp, but the Bioelectrics are preserved very well. I combined the two results in Photoshop to try to keep the best parts of both.
This is how it looked like on the model:
This is how it looked like on the model:


Demonstration: AI Upscaling (Advanced)
This method uses ESRGAN (Enhanced Super-Resolution Generative Adversarial Networks) which is an open source upscaler based on this research paper. This article summarises its capabilities nicely without having to read through a scientific paper. Multiple models can be loaded into ESRGAN which can generate different outputs for example, there are models for anime stylisation, ones specifically to enhance text, ones for photos, etc.
It requires Python 3.9 and a NVIDIA CUDA-capable GPU which is the environment I was already using, so in my case I only needed to clone the GitHub repository and run the Python script using my terminal. I will not go into detail about how to set this up, as the GitHub page and Upscale wiki already has instructions on this.
I ran the four textures for Walton Simons through using the BSRGAN model, not the default one, as it came out far better for texture upscaling.
Results:


Tools
- Unreal Engine Resource Viewer (umodel):
https://www.gildor.org/en/projects/umodel - Blender:
https://www.blender.org/download - Unreal Engine 1 Vertex Mesh Blender Exporter:
https://github.com/Skywolf285/UE1-VertexMesh-Blender-IO/releases - XNA Lara XPS:
https://core-design.com/community_xps.html
AI Upscaling Tools
- AI Res Up Tool:
https://www.skacikpl.pl/projects#AIRU - NVIDIA Ansel AI Enhancer:
https://github.com/dynamiquel/NVIDIA-Ansel-AI-Enhancer - Topaz Photo AI:
https://www.topazlabs.com/topaz-photo-ai - Img Upscaler:
https://imgupscaler.com - NVIDIA CUDA Toolkit:
https://developer.nvidia.com/cuda-downloads - Python 3.9:
https://www.python.org/downloads/release/python-390 - ESRGAN:
https://github.com/xinntao/ESRGAN
No comments:
Post a Comment